'The name seems familiar somehow...'
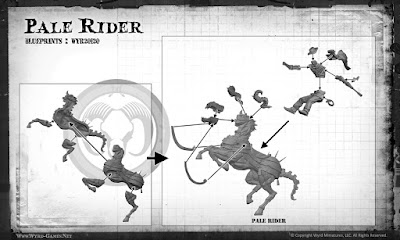
The Pale Rider box contains enough parts for one miniature...namely the Pale Rider. It also contains a stat card for him though there are no upgrade cards.
Pale Rider - Sprue
The box has one sprue in it split into two pieces (so it actually fits in the box one presumes) as well as the aforementioned card. Here's pictures of both sides of them...
Pale Rider - Stat Card
Wyrd Games didn't like my publishing pictures of both sides of the stat cards so you'll have to make do with this...
Should there be any assembly issues with the model then they will be listed in the appropriate section and you can view larger versions of the smaller pictures or instruction pictures by clicking on them.
Pale Rider - Instructions
Some General Notes on Assembly.
Many of these models contain quite small parts so depending on how dexterous you are you might consider getting yourself some tweezers. Dry-fitting is also always a good idea in case a part needs a tiny bit of extra filing or filling as some of the fits are quite tight. Where the parts on the sprue are quite thin (chains, weapon shafts, cables and the like) then it might be better to remove parts with a sharp scalpel rather than cutters.
Pale Rider- Assembled
Not many issues with this one. There are some thin spikes on the horses back that you need to be careful of when you press the two halves together as they manage to be both quite delicate and strangely sharp at the same time, lol. The rider is assembled separately and there's an indention in the hat that tucks into the horses neck to get that leaning forward pose with the right arm holding onto the neck. The horses reins form two halves of a 'pommel' on the horses saddle with the other ends lining up just below the horses chin. There is a tiny piece of tubing that slots into the gun but the location point is quite obvious and at least it's one piece and not two...
One significant issue worth noting is that the whole model is balanced on one foot...and it's not exactly a small model. I used glue and placed a piece of cork under the legs to keep it in position while it went off. You could pin it though I suppose but there isn't a massive amount of foot to pin into before you'd reach the bend in the leg.
One of my blog readers Mat Richardson-Jack had this to add..
Just wanted to add that after I'd removed the reins from the sprue, I decided to clean them up by removing the 'tab' half way along their inside edge. It turns out that these are supposed to slot into the notches on the horse's neck. Doh! Pretty obvious in retrospect, and it doesn't affect final model, but thought I'd share anyway.
Here's some close-ups...
Normally there would be a comparison picture here but I don't have a model to compare it to...should that change in the future then the picture will appear here somewhere.
Thoughts and comments are (as usual) most welcome.


Thanks Gmort for excellent unboxing as always.
ReplyDeleteJust wanted to add that after I'd removed the reins from the sprue, I decided to clean them up by removing the 'tab' half way along their inside edge. It turns out that these are supposed to slot into the notches on the horse's neck. Doh! Pretty obvious in retrospect, and it doesn't affect final model, but thought I'd share anyway.