Showing posts with label Tyranid Project. Show all posts

Monday, 9 August 2010

Tyranid Project – Can Termagants actually kill things…


Editors Note – This article is quite long by my usual standards so you might want to make yourself a cup of tea before you start reading…

Termagants are the cheap and cheerful troop choice for Tyranids and essential in any army that wants their Tervigons to be scoring.

Though are they actually good for anything other than being scoring?

Lets let Mathshammer do some of the decision making for us ;-)

We’ll start with the worst-case scenario and gradually give the Termagants some advantages as we go.

For those of you who don’t know the Termagants stats are,

WS 3, BS 3, S 3, T 3, W 1, I 4, A 1 Ld. 6, Save. 6+

With the average roll of a die being 3 or a 4, we’ll end up spawning between 9 and 12 Termagants most of the time and as we need a basic unit of 10 to make our Tervigons scoring to start off with we’ll take 10 as our nice round unit number for testing purposes.

As I’m sure (like me) you end up playing against Marines 4 out of 5 games we’ll use them as our ‘Control’ enemy. We’ll use a squad of 10, as full Marine Squads are still common even with the current trend for Razorbacks units. We won’t bother giving them any fancy weapon options or extra abilities and just to keep it relatively simple we’ll keep them as ‘ordinary’ tactical Marines.

I’m also not going to include the chance of Termagants shooting before charging into the final calculations but for those of you who care about such things,

10 shots, 5 Hit, 2.5 Wound, 0.83 Marines dead after armour saves. Great bugger all happened...

So then, onto the Maths.

Worst case for the Termagants is no upgrades and being charged. This also means were going at the same time as the Marines so no matter how many we kill they’ll all still get all their attacks back.

Termagants (Charged),
10 Attacks, 5 Hit, 1.67 Wound, 0.56 Dead Marines after their 3+ Armour Saves.
Marines (Charging),
21 Attacks, 14 Hit, 9.33 Wounds, 7.83 Dead Termagants after their 6+ Saves.

The Termagants will either be run down, chased off the board or (if their in synapse range) die to ‘fearless’ wounds.
Hang on a bit though…they might have ‘Feel no Pain’ from ‘Catalyst’. So only 3.92 of our Termagants may have died.

So let’s presume they did have ‘Feel no Pain’ and amazingly make the 3 Fearless wounds they’re forced to take and try out round 2 (after rounding our dead guys to the nearest whole model).

Termagants,
6 Attacks, 3 Hit, 1 Wound, 0.33 dead Marines after their 3+ Armour Saves.
Marines,
10 Attacks, 6.67 Hit, 4.45 Wound, 1.85 dead Termagants after 6+ Armour and Feel no Pain is taken into account.

Well we could go on but I’m sure we can see how it’s going. An un-upgraded unit of Termagants dies if charged and if it has ‘Feel no Pain’ can maybe survive a 2nd Game turn of combat if their lucky after taking a grand total of 2 (rounding up) or 0 (rounding down) Marines with them.

Lets give the Termagants the charge this time. We’ll also give them Feel no Pain again as we’ve already worked out that they die horribly without it.
I’m also going to stop repeating myself a bit as I’m sure you all know what a Marines armour save is by now.

Round 1.

Termagants (Charging),
20 Attacks, 10 Hit, 3.34 Wound, 1.13 Marines dead.
Marines (Charged),
11 Attacks, 7.33 Hit, 4.9 Wound, 2.04 Termagants dead.

Round 2.

Termagants,
8 Attacks, 4 Hit, 1.34 Wound. 0.89 Marines dead
Marines,
10 Attacks, 6.67 Hit, 4.45 Wound, Termagants 1.85 dead.

So we’ve successfully ‘Tar-pitted’ the Marine unit for as long as we can keep Feel no Pain in place. But that’s about it till they finally kill each other 6 or so rounds of combat later.
If the Sergeant had a Power weapon or Power Fist however we’ll be lucky to tie them up for even 4 rounds.

I think it’s time to stop playing fair don’t you?


If were playing a ‘swarm’ list then we’ve most likely given Adrenal Glands (Furious Charge) and Toxin Sacs (Poison) to all our units. If were using them in conjunction with Tervigons then we’ve most likely given the Tervigon those same upgrades so that Termagants within 6” get the benefit of them.

Also given that the Tervigon can spawn Termagants 6” away and they can still move, shoot and assault as normal the chances of us getting charges are quite good.

So this time the Termagants are charging and have Furious Charge, Poisoned Attacks and Feel no Pain all thanks to either the Tervigon, their own upgrades or some combination of the 2.

Termagants (Charging). Due to the way the poison rule works we also get a re-roll to wound this turn as we would be wounding on 4’s anyway (due to Furious Charge).
20 Attacks, 10 Hit, 5 Wound, 7.5 with the re-roll 2.5 Marines Dead.
Marines (Charged) Minus the 3 guys who died (rounding to the nearest whole number).
7 Attacks, 4.67 Hit, 3.11 Wound, 1.3 termagants Dead

Hey, we won a combat (Just)…go team Tyranid!!!

Round 2 (Furious Charge no longer an issue, Poison still helping though)
Termagants,
9 Attacks, 4.5 Hit, 2.25 Wound (no re-roll this time), 0.75 Marines dead.
Marines,
7 Attacks, 4.67 Hit, 3.11 Wound, 1.3 termagants Dead.

Bollocks, were back to killing a guy each per turn...

Right now lets pile on every benefit we can possibly crowbar out of the Tyranid Codex and see if we can give these Marines a proper kicking (or biting, or clawing etc.)

First were going to use the Hive Tyrant/Swarmlord’s Paroxysm* on the target unit and give the Termagants ‘Preferred Enemy’ from either the Hive Tyrant’s ‘Old Adversary’ upgrade or via the Swarmlords ‘Swarm Leader’ ability. The were going to also give them every benefit they can get from the Tervigon (Furious Charge, Poison and Feel no Pain).

*It’s a psychic shooting attack that reduces a unit to both WS and BS 1 till the beginning of the Hive Tyrants next turn. This means those pesky Marines will be being hit on 3’s but hitting back on 5’s.

Right lads, you now have all the help we can give you…do us proud ;-)

Round 1.

Termagants (Charging),
20 Attacks, 17.78 Hits (13.33 normal hits and another 4.45 from our ‘Preferred Enemy’ re-roll.
13.34 Wounds (8.89 normal wounds and another 4.45 from our ‘Poison’ re-roll).
After armour saves we’ve killed 4.45 Marines.
Marines (Charged and feeling a bit victimised and also at WS1),
7 Attacks, 2.33 Hit, 0.58 Wounds, 0.24 Termagants dead.

So we’ve easily won this one and taking a morale test at –4 there’s a good chance the Marines will fail. So they either get away and can be escorted off the board or they are caught and another 1.33 Marines die to ‘No Retreat’ rules.

Lets say we catch them.

Round 2**

**Now it gets a bit tricky here as the Swarmlords ‘Preferred Enemy’ ability only lasts for the Tyranid turn but ‘Old Adversary’ is a permanent ‘buff’. As more people use Tyrants than Swarmlords (even though I don’t) we’ll let the Termagants have their Preferred Enemy this turn as well.

Termagants,
10 Attacks, 8.89 Hits (with re-rolls), 4.45 Wounds (no re-rolls this time), 1.48 Dead Marines.
Marines,
7 Attacks, 2.33 Hit, 0.58 Wounds, 0.24 Termagants dead.

So at the end of round 2 our Termagants are unharmed and the Marine unit has been cut in half. After that it will get a bit messy, but I think we’ve done enough damage to be able to finish them off without much help.

So what have we learned?

Termagants need support…well you’d probably worked that out anyway but it’s worth mentioning. Also, Feel no Pain via ‘Catalyst’ made (by far) the biggest difference to the combats more by saving Termagants than adding to their killing potential.

So to summarise Termagants can kill things but only with a lot of help. They are however quite good at keeping a unit in place ready for your Monstrous Creatures to stroll in and mush the last few guys ;-)
Used appropriately these cheap little critters can easily turn the tide in your favour, hopefully your opponent will be to busy trying to kill Tyrants, Tervigons and the like to bother with these guys until it’s too late ;-)

Of course you may not be fighting against Marines.

As I can’t be arsed to go through all that Maths again we’ll take the most likely scenario and try a game turn of combat against a few other things.

For all the following combats were going to be presuming we have Feel no Pain, Furious Charge and Poison.

Vs. Orks.
30 Orks on foot are highly unlikely to still be 30 Orks when they reach you. However they may have some kind of Transport that doesn’t fall apart when you throw a sharp rock at it such as a Battlewagon. Either way we’ll call it 19 Orks Boyz and the obligatory ‘Nob’with Power Klaw.

Round 1.
Termagants (Charging),
20 Attacks, 10 Hit, 5 Wound, 7.5 with the re-roll, 6.25 Dead Orks.
Orks (Charged),
39 attacks, 23 Hit, 11.5 Wound, 4.79 dead Termagants
3 Power Klaw attacks, 2 Hit, 1.67 dead, making a grand total of 6.46 dead Termagants.

Round 2.
Termagants,
4 Attacks, 2 Hit, 1 Wound, 0.83 Dead Orks.
Orks,
39 attacks, 23 Hit, 11.5 Wound, 4.79 dead Termagants
3 Power Klaw attacks, 2 Hit, 1.67 dead, making a grand total of no Termagants left.

Lesson Learned: Don’t get into combat with Orks unless you have at least 30 Termagants or there are only 6 of the Orks left ;-)

Vs. Eldar.
Dire Avengers seem to be the Troop of choice for eldar players locally so we’ll use them for testing purposes.

Round 1
Termagants (Charging),
20 Attacks, 10 Hit, 5 Wound, 7.5 with the re-roll, 3.75 Dire Avengers souls off into the Warp ready for Slaanesh to have as a nice snack.
Dire Avengers (Charged but still getting all their attacks as they are I 5)
10 Attacks, 6.67 Hit, 3.34 Wound, 1.39 dead Termagants.

Termagants win by 3, leaving the Dire Avengers needing a 6 or lower on their morale test to avoid running. An average roll will be a fail, meaning we catch them and they die, or they get away and what happens next will be decided by how far they run and how far the Termagants consolidate. Of course they may pass the test…lets presume they do.

Round 2.
Dire Avengers (going first this time)
6 Attacks, 4 Hit, 2 Wound, 0.84 Termagants dead.
Termagants,
8 Attacks, 4 Hit, 2 Wound, 1 Dire Avenger dead.

Now were in the ‘Tar-Pit’ stage again, oh well…

In Conclusion.
I’m bored now and I’ve a feeling you lot are probably getting that way as well. Neither of those examples really changes my conclusions from the Marine ones at the beginning.

Termagants are cheap, can kill shit if things go their way but don’t stand a chance against anything built for combat.

But what were you expecting for 5 points a model?

Thoughts and Comments are (as usual) most welcome.

Sunday, 8 August 2010

Tyranid Project - Part 16 - Tweaking Time

Strangely enough (for a first attempt) my Tyranid army seems to need very little in the way of tweaking. After 11 games with only a single loss (which was the first game I played) it seems to contain all the tools I need to compete against most common builds.

The only thing that was utterly useless was the 'Strangleweb' on the Termagant units, which will now be dropped for another 2 Termagants in each unit.

Editors Note - A 3rd consecutive day of my FLGS being shut has yet again prevented me from finishing my Swarmlord , a problem that will be somewhat compounded by the fact that it's closed of a Monday and a Tuesday anyway. Looks like he'll just have to stay armless for the time being.

The Tweaked army...


There may well be enough in the budget this month for another Carnifex so my 2000 point army should look something like this.

2000 Pts - Tyranids Roster - Tyranid Test list - 2000

HQ: The Swarmlord (1#, 280 pts)
1 The Swarmlord @ 280 pts

: Tyrant Guard Brood (2#, 130 pts)
2 Tyrant Guard Brood @ 130 pts (Lash Whip)

Elite: Hive Guard Brood (2#, 100 pts)
2 Hive Guard Brood @ 100 pts

Elite: Hive Guard Brood (2#, 100 pts)
2 Hive Guard Brood @ 100 pts

Elite: Hive Guard Brood (2#, 100 pts)
2 Hive Guard Brood @ 100 pts

Troops: Tervigon (1#, 195 pts)
1 Tervigon @ 195 pts (Adrenal Glands; Toxin Sacs; Catalyst)

Troops: Tervigon (1#, 195 pts)
1 Tervigon @ 195 pts (Adrenal Glands; Toxin Sacs; Catalyst)

Troops: Tervigon (1#, 195 pts)
1 Tervigon @ 195 pts (Adrenal Glands; Toxin Sacs; Catalyst)

Troops: Termagant Brood (10#, 50 pts)
10 Termagant Brood @ 50 pts

Troops: Termagant Brood (10#, 50 pts)
10 Termagant Brood @ 50 pts

Troops: Termagant Brood (10#, 50 pts)
10 Termagant Brood @ 50 pts

Heavy Support: Tyrannofex (1#, 265 pts)
1 Tyrannofex @ 265 pts (Rupture Cannon; Cluster Spines; Thorax Swarm (larvae))

Heavy Support: Tyrannofex (1#, 265 pts)
1 Tyrannofex @ 265 pts (Rupture Cannon; Cluster Spines; Thorax Swarm (larvae))

Total Roster Cost: 1975

The last 25 points will either go on extra Termagants, Scything Talons for the Tervigons or some combination of the 2.

I suppose I might as well start painting it now...


Saturday, 7 August 2010

Tyranid Project - Part 15 - Doable on a Budget?


I have been somewhat handicapped by my FLGS not being open today as...

1) The guy who's giving me the swords for my Swarmlord wasn't going to be there.
2) I wasn't going to drive 10 miles out of my way to the next nearest shop just to buy 'Chaos Black' undercoat.

Tomorrow however I should be finished up to the under-coated stage.


I went with the Hive Tyrant model as my Swarmlord as I may use the Trygon as a...well... Trygon...but only at 2000 points...maybe...

I also wimped out on my objective markers and just glued the tube thingys from the Genestealer sprues to 40mm bases.

As I'm at a bit of a standstill (and haven't finished either of the other 2 articles I'm currently writing) this might be a good time to review how much It's actually cost me *

*I know that may not be important to everyone but it's certainly important to anyone currently on a tight budget (like me for example).

So I was fortunate that my Girlfriend had bought me the 'Tyranid Assault Brood' £100 box last year and could use that as the basis for my army. However in these budget conscious times would this have been an expensive army to build had I bought everything individually?

Lets see ;-)

1x Swarmlord/Hive Tyrant - £30
4x Carnifex (2 as Tervigons and 2 as Tyrannofex) - £108
3x Boxes of Warriors (2 boxes to make 6 Hive Guard and 1 to make 2-3 Tyrant guard) - £60
3x Monstrous Arms Sprues (Warrior boxes only come with 1 of those sprues and I used the same bits off 1 for each Hive Guard so therefore needed 3 more to make 6 total) - £18
4x Oval Bases £2.50 each - £10

My personal experience has led me to the (with no science or maths to back it up, sorry) conclusion that you need about 25 Termagants per Tervigon for 'Spawn Termagants' purposes on top of the 2 lots of 10 you need to take to make the Tervigons troops.

Which for the mathematically astute of you means I need 70.
Which is either 6 boxes of 12 - £90 0r,
14 boxes of the snap fit 'no options' type which comes to £68.60

Scrounging bits for objective markers should be free so £0 for those.

Which using all the cheap options comes to £294.60 for the models

Also we best include all the misc. bits as well

1x 'Chaos Black' £8 (I know I said I needed to buy another one but the first can started more than half empty)
2x plastic Glue £4 each - £8
2x Super Glue £4 each - £8
1x Green Stuff - £6
1x PVA - £5
1x Modelling Sand - £5

Lots of rocks for basing which if I'm being honest I stole..er, I mean acquired from a number of random locations.

So that's another £40,

Bringing our grand total for our/my wonderful looking (imo obviously) Tyranid army to £334.60

I'm presuming you already have paints, if not add another £20-50 depending on how many colour variations you include.

I'll leave you to decide if that's reasonable or not.....

Wednesday, 4 August 2010

Tyranid Project - Part 14 - Tyrannofex 2

Real life has managed to interfere with my 40K yet again. Some of that interference was a bit of freelance servicing work which managed to pay the bills for another month so I can't really complain that much, lol.

With that out of the way I can get back to my Tyranid Project.

So, with the arrival of my oval bases I've finally managed to get around to building my 2nd Tyrannofex.

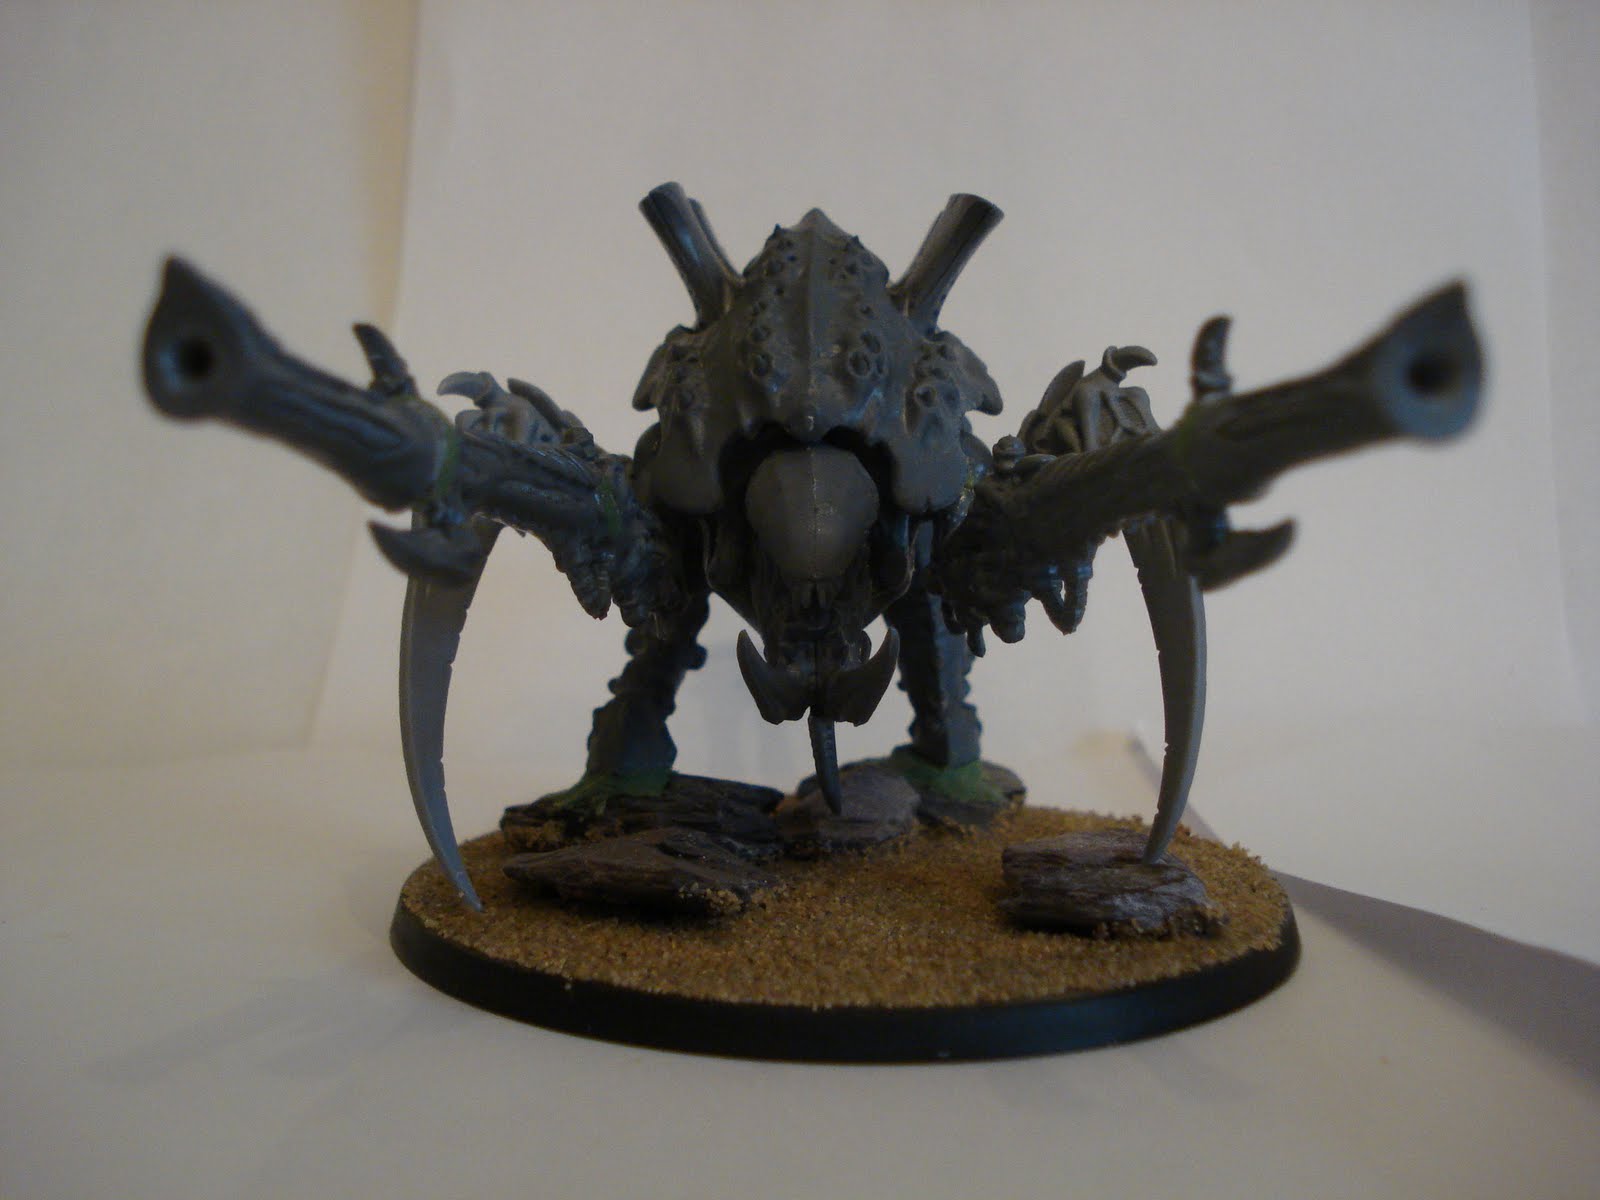
TYRANNOFEX 2, SIDE VIEW.

TYRANNOFEX 2, OTHER SIDE VIEW.

TYRANNOFEX 2, FRONT VIEW.

TYRANNOFEX 2, TOP VIEW.

TYRANNOFEX 2, ANGLED VIEW.

I'll undercoat it tomorrow together with the 86 Termagants.

I'm now just a Swarmlord away from a fully WYSIWYG Tyranid army :-)

On the subject of The Swarmlord I'm now reconsidering using the Trygon model and may just use the standard Hive Tyrant with some extra plasticard Boneswords, magnetised so I can swap weapons around. That way I can use the Mawloc/Trygon actually as a Mawloc/Trygon and work out if it's viable as my 3rd Heavy Support choice at 2000 points.

Comments are (as usual) welcome.

Sunday, 1 August 2010

Tyranid Project - Part 13 - Horde Tyranids.


So the pile of Termagants got me thinking about whether a Tyranid Swarm list is viable in 5th ed.

First lets look at some of the problems 5th Ed. Inflicts on us daily.

Mechanisation – Okay we all know that in 5th ed. The vehicle is king. A highly forgiving set of vehicle damage tables, combined with cover save providing options like Smoke Launchers, Kustom Force Fields and various ‘Shield’ psychic powers makes killing vehicles a chore. Not to mention that you’ve still got to hit and penetrate them first. Tyranids get access to a number of units capable of killing light transports but only Hive Guard could be considered reliable.

Land Raiders – Part of the above problem but also worthy of their own subsection. Armour 14 all around means that you need S10, Lance or Melta, AP1 or some combination of the above to reliably kill a Land Raider. Tyranids basically only get 2 options that can do this (Tyrannofex with Rupture Cannon and Zoanthropes with Warp Lance) and neither of them can be considered reliable.

Marines – Yes, Marines. 4 out of every 5 armies I see are of 1 Marine variant or another. Most Tyranid weapons are AP4 or lower (even the high strength ones), which means Marines are getting armour saves from 90% of what Tyranids can throw at them. As we are talking about hordes here they’ll also be getting 3+ saves in combat, will be getting hit on 4’s but hitting back on 3’s and against un-upgraded units will be wounding on 3’s and being wounded on 5’s. This means that a considerable volume of attacks is needed to put even a small dent in a Marine unit, while the Marines will be generating a lot of wounds back.

Templates – As any honest Ork player will tell you, thinking that your opponent can’t possibly kill 160 models is an excellent way to open yourself to disappointment. Massed Orks routinely die to even a half arsed amount of Flamer weapons and if those Flamers are vehicle mounted the problems are compounded even more. If T4 Orks have this problem what chance do T3 termagants have?


So what options does the humble Tyranid player like myself have to get around these problems?

Lets start with the major one – Vehicles…

Even 60 odd S4 (and that’s with Furious Charge) attacks on the charge have a very low chance of harming an armour 10 vehicle that’s moved over 6”

60 Attacks, 10 Hit, 1.667 Glancing hits…Well that’s just wonderful :-(

So we really need to work out how to de-mechanise that opposing army before we even start to think about our horde of infantry munching space bugs.

Our options are,

Hive Guard – BS4, 24” Range, S8, A4, Assault 2
Okay for taking out light transports, but even taking into account T6 and 2 Wounds an armour save of 4+ makes us vulnerable to even the lowly Heavy Bolter.

Zoanthropes – So they have a S10, AP1 weapon but they can be easily shut down by psychic defense and are not in the least survivable.

Tyrannofex with Rupture Cannon – 2x S10 shots at BS3 is averaging 1 shot per turn. Decent enough at popping light vehicles not so hot once we reach the Armour 14 level.

Anything with a Venom Cannon – S9 would be nice but the minus 1 to the result on the Vehicle Damage Table reduces their chances of destroying a vehicle (the result we really need) by 50%.

So the options aren’t brilliant. It looks like we’ll need Hive Guard and a couple of Tyrannofex’s before we even start to think about our actual horde.

So onto HQ’s,
As were not going down the uber killy path something cheap will do.
Best candidate is obviously a Tyranid Prime, which un-upgraded only costs 80 points. As he’s only there to provide Synapse and the mandatory HQ he’ll probably do, maybe 2 of them would be better as I wouldn’t be particularly happy with only a single synapse source.

Supporting the swarm.
So let now look at what can help out our swarm.
Tervigons are a great supporting unit but primarily only help Termagants and we’re not going to get very far just using mass Termagants. Catalyst (which gives a unit within 12” Feel no Pain) can affect any unit but as it can only affect a single unit we’d need a prohibitively high amount to be much use to our swarm of doom.
Venomthropes give a 5+ cover save to any unit within 6”, which is certainly worth having, they also give those units defensive grenades as well as other benefits. They are however very delicate so are extremely vulnerable to enemy shooting. We’d probably need at least 2 of these (more likely 3), which also use up an Elite slot that I could do with putting Hive Guard in. Still if that’s what we’ve got to do then we’ll just have to make do with 2 units of Hive Guard rather than 3.

The Swarm.
We have 5 options, which are (in no particular order) Termagants, Hormagaunts, Ripper swarms, Gargoyles, Sky Slasher Swarms.

Both Ripper and Sky Slasher Swarms are rubbish so we’ll cross them from the list straight away.


Termagants that are unsupported by Tervigons are going to need both Toxin Sacs and Adrenal Glands which makes them 7 points each. Slow and relatively easy to kill these would serve better as our objective holding units.

Hormagaunts are a bit faster than Termagants due to ‘Bounding Leap’ and ‘Fleet’, Have 2 attacks base but weigh in at 10 points each once the Toxin sacs and Adrenal Glands are added in. These would most likely be our ‘Taking other objectives’ unit.

Gargoyles are the fastest horde unit we have available as they are classed as Jump Infantry. They also have the ‘Blinding Venom’ ability which makes any to hit roll of a 6 wound automatically, which obviously ups our successful attacks by a bit. Other than those abilities they’re basically flying Termagants and set us back 8 points per model once the (imo) mandatory Glands and Sacs are added. These would obviously be our ‘in your face early’ unit.

So if you stick that all together then we’re going to need a couple of cheap Synapse HQ’s, Hive Guard, Tyrannofex’s, 2 or 3 Venomthropes, Termagants, Hormagaunts and Gargoyles.

I’ll try and make an at least semi viable list out of that later, but if anybody else wants to have a go then I’m open to suggestions…

Saturday, 31 July 2010

Tyranid Project - Part 12 - Termagants Part 2

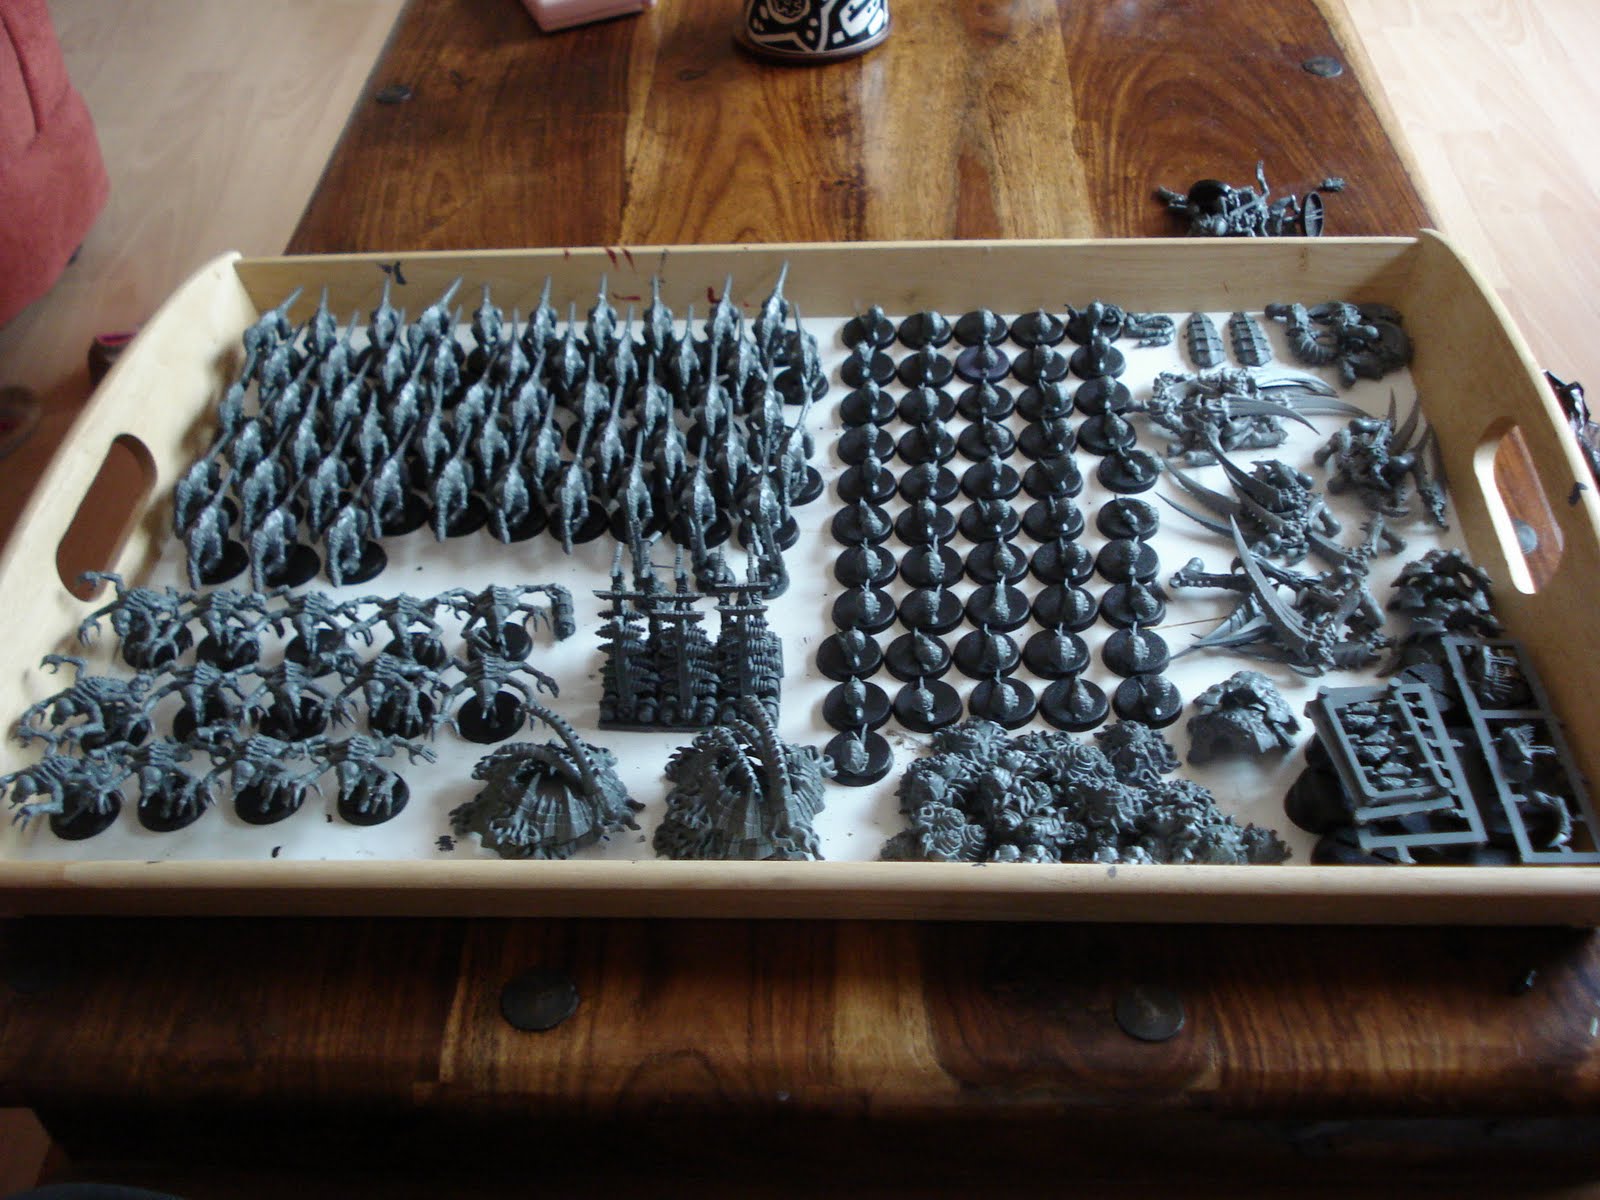
86 Termagants. Holes filled, Mould lines removed (for the most part anyway), based and ready for undercoating.


Almost makes me want to do a horde Tyranid army...

Editors Note - I have added a 'Tyranid Project' label to all the appropriate posts so anyone who's interested (or masochistic) can find them easily ;-)

Friday, 30 July 2010

Tyranid Project - Part 11 - Termagants

So my large oval bases arrived at my FLGS today, which means I can finally start on my 2nd Tyrannofex. As I'm basically just going to copy the first one it shouldn't take long. It will however be kept as my reward to myself after I sort out another little problem.

Due to much generosity from several of my friends I now have a pretty substantial pile of 'Battle for Macragge' Termagants.

A large percentage of them seem to share the same problem, however...

As they have been donated by several different people, all of which are experienced hobbyist's I can only presume that the chunks missing from the carapace and tail are a result of the way they were originally attached to the sprue.

The tail was easy enough to reshape by filing, but apparently Green Stuff is a bit messy to use in such a small gap...


However with a bit of tidying up...


I'll smooth it down a bit more when it's dry.

1 Down, 60 (ish) to go.

Tomorrows going to be a looooooonnnng day :-(

Monday, 26 July 2010

Tyranid Project - Part 10 - Unit Analysis


So I've had a few games. A few units have performed well...others...well not so much.

Time for a brief overview of how each unit has done. These assessments will be how they and their abilities compliment my army so I'll be ignoring certain abilities which are of no benefit to me currently (like the Swarmlords 'Alien Cunning' rule for example).

Starting at the top,

The Swarmlord.
A bit of a points sink weighing in at 280 points. He does however do his job very well. Being able to give a friendly unit within 18" either Furious Charge or Preferred Enemy* is brilliant but he will for the most part be giving it to his own unit, It's also worth remembering that these abilities only last to the end of your turn so you don't get the benefit of preferred enemy in your opponents assault phase.
Though he has all 4 of the Hive Tyrant's abilities the 2 you'll get most use out of are Leech Essence and Paroxysm to the point that should I ever replace him with a standard Hive Tyrant those will be the 2 powers I pick.
Pretty much anything you end up in assault with (with the possible exception of TH/SS Terminators) will be dead in at worse 3 or 4 rounds of combat (and that includes attached characters) .
As with all such things there is a downside and this is his...without Tyrant Guard to absorb wounds and grant the unit cover saves he will NEVER reach assault. In the world of Mech that we currently live in, any even semi-optimised army will have enough ranged anti-tank to carve 6 wounds off a MC with no inv. save against shooting with ease. This seems like as good a time as any to move onto...

* Well he can also dish out Acute Senses as well, but as that's only of any real use in turn 1 of Dawn of war so I haven't used it yet.

Tyrant Guard.
Essential to anyone who wants their Hive Tyrant/Swarmlord to actually have a chance to rip something in half. As they are infantry they can get cover saves if 50% of the unit is in cover, this means that as long as the Tyrant Guard get a cover save or are in cover the Tyrant will get one as well if he is joined to the unit. They're pretty good in a fight themselves being WS 5, S 5 and having 3 attacks basic and if you happen to get a rending roll as well then all the better. Mine have Lash Whips which are useful as my Swarmlord doesn't get the option for them himself.

Hive Guard.
The no-brainer Elite choice. 2 S8 shots each at BS4 do a great job of carving through light Mech, Transports and denying Blood Angels their Feel no Pain save. I take 3 units of 2 and am yet to regret the decision.
There are people who champion the Zoanthrope as an Elites choice but imo they're wrong, my reasoning behind this is here. If you must use an Elite slot for something else (Deathleaper, maybe) then combine the 3 lots of 2 into 2 lots of 3. In most scenarios you'll need to advance at least 2 units of them forward due to their 24" range, luckily Termagants make a nice cheap piece of moving cover.

Tervigon.
A 6W , T6, Monstrous Creature that can hold an objective and make more Termagants...Fucking ace I'll have 2...
In objective missions one sits back and holds my home objective while the other moves forward giving the Termagants the benefit of both her Adrenal Glands (Furious Charge) and Toxin Sacs (4+ poison).
Though there have been rare occasions when Onslaught (gives the ability to run and shoot to a single unit) would have been useful, Catalyst (Gives Feel no Pain to a unit) has been priceless. If I had the spare points I'd have both but being as I had to choose I picked Catalyst which has been consistently useful. For the most part I've used it to increase Termagant survivability, but it has also been used to help out both The Swarmlord and Hive Guard units when necessary.
'Spawn Termagants' though useful, is so random that it can't be relied upon. Best to consider each unit produced as a bonus rather than rely on them to win you games. Also resist the temptation to get trigger happy and start producing Termagants from turn 1, much better to wait till you know where they'll be needed.
The default ability 'Dominion' which extends synapse range to 18" is always worth remembering if you happen to have a unit out on it's own that you really need to go where you want it to. Not used often but you get it for free so it's worth remembering you have it.**
Though it's possible to upgrade the Stinger Salvo to Cluster Spines I don't on the Tervigon for the simple reason that I'll probably be pretty damn close behind the Termagants that I'm enhancing and I don't wan't to risk dropping a Large Blast Marker on them...

** I have a terrible habit of forgetting abilities that I haven't had to pay extra points for...

Termagants.
Obviously I need 2 units of 10 to make my Tervigons troops so that's what I've got.
A unit of un-enhanced Termagants is basically useless against pretty much anything due to the string of 3's on their Statline (Initiative is 4), 1 base attack and their 6+ armour save.
However, once you start piling on the potential upgrades they become a lot more useful. It's fairly easy to end up with Furious Charging, Poisoned guys with Feel no Pain. Furious Charge makes them Initiative 5 so they're hitting before those annoying Marines that seem to be everywhere these days and their Strength obviously goes to 4 for that turn. This is doubly useful, Firstly because your now wounding Marines on 4's and Secondly that means that if your also getting poisoned attacks your rerolling that 4 to Wound (just for that turn mind you, but anything that ups the number of saving throws your opponent has to make is a bonus when you need as much dead before it can hit you back as possible) due to the Poison rule. Mine have Stranglewebs which I am yet to have the opportunity to use, they therefore may be going in exchange for another 2 Termagants per unit when I next tweak my list.
Their default ranged weapon is for all intents and purposes a Bolt Pistol. The points cost of ranged weapon upgrades is not worth it in my opinion, best to keep them cheap as they're going to die anyway.

Tyrannofex.
The much maligned by so-called (and for the most part) self titled experts, Tyrannofex. I happen to think they're awesome.
T6, 6W, 2+ Save makes anti-tank weapons the only reliable way of killing them.
The Rupture Cannon is the obvious weapon upgrade : S10, Assault 2 (making up for the BS3) and a 48" Range. With a secondary ranged weapon and a built in Flamer they're pretty good up close as well.
In my first game I made the mistake of using the Tyrannofex like a 'Rifleman' Dreadnought which it isn't, Unlike most long range gun platforms there is no need to tuck it away in a corner somewhere. First couple of turns use the Rupture Cannon to pop Transports, then when you get a bit closer you can start dropping Large Blast templates on the former occupants then finally you can unload that lot and your Flamer on something before Charging it and finishing off what's left.
Unlike with the Tervigons, I upgrade the Stinger Salvo to Cluster Spines as I'd rather have a S5, AP-, Large Blast at BS3 than 4 S5, AP4 shots at BS3. A hit with the Cluster will generate a lot more wounds than the 2 hits I'll get on average with the Salvo.
The Thorax Swarm (which can be fired in addition to any other weapons the model has) is upgraded to 'Larvae' as my experience with Sternguard (both with and against) has led me to believe that anything wounds on 2's is pretty fucking useful to have.

So that's it then, my experiences after a grand total of 4 games using my Tyranids.

The floor is now open for opposing viewpoints...

Sunday, 25 July 2010

Tyranid Project - Part 9 - Game 3 vs. Imperial Guard

So time for the latest instalment of 'Ill screw up so you don't have to' ;-)

Had an opportunity to test my Tyranids out against Imperial Guard and Blood Angels (Again) today.

Must admit that I wasn't very hopeful about the outcome of either but they both went better than I was expecting.

In the 1st game I was playing against this list,

1750 Pts - 5th Edition Roster - Daves Imperial Guard - 1750

HQ: Company Command Squad (5#, 70 pts)
2 Company Command Squad @ 70 pts (Heavy Weapons Team)
1 Heavy Weapons Team (Lascannon)
1 Company Commander

Elite: Ratling Squad (5#, 50 pts)
5 Ratling Squad @ 50 pts

Troops: Infantry Platoon (55#, 340 pts)
1 Infantry Platoon @ 340 pts
4 Platoon Command Squad
1 Platoon Commander
7 Infantry Squad (Heavy Weapons Team)
1 Heavy Weapons Team (Autocannon)
1 Sergeant
7 Infantry Squad (Heavy Weapons Team)
1 Heavy Weapons Team (Autocannon)
1 Sergeant
7 Infantry Squad (Heavy Weapons Team)
1 Heavy Weapons Team (Autocannon)
1 Sergeant
7 Infantry Squad (Heavy Weapons Team)
1 Heavy Weapons Team (Missile Launcher)
1 Sergeant
7 Infantry Squad (Heavy Weapons Team)
1 Heavy Weapons Team (Missile Launcher)
1 Sergeant

Troops: Veteran Squad (10#, 90 pts)
9 Veteran Squad @ 90 pts (Meltagun x2)
1 Veteran Sergeant

Fast Attack: Valkyrie Assault Carrier Squadron (1#, 130 pts)
1 Valkyrie Assault Carrier Squadron @ 130 pts
1 Valkyrie (Multiple Rocket Pods x2)

Fast Attack: Vendetta Gunship Squadron (2#, 260 pts)
1 Vendetta Gunship Squadron @ 260 pts
1 Vendetta
1 Vendetta

Fast Attack: Hellhound Squadron (2#, 260 pts)
1 Hellhound Squadron @ 260 pts
1 Bane Wolf (Heavy Flamer)
1 Hellhound (Heavy Flamer)

Heavy Support: Hydra Flak Tank Battery (2#, 150 pts)
1 Hydra Flak Tank Battery @ 150 pts
1 Hydra Flak Tank
1 Hydra Flak Tank

Heavy Support: Leman Russ Squadron (1#, 200 pts)
1 Leman Russ Squadron @ 200 pts
1 Leman Russ Demolisher (Lascannon; Heavy Bolter Sponsons x2)

Heavy Support: Leman Russ Squadron (1#, 200 pts)
1 Leman Russ Squadron @ 200 pts
1 Leman Russ Demolisher (Lascannon; Heavy Bolter Sponsons x2)

Total Roster Cost: 1750


Dave's been using this list for quite a while so he's pretty much got the hang of it. For those long term followers you may remember it as the army that destroyed my Chaos Daemons.

I haven't bothered to take pictures of every stage as certain things are now obvious and can be learned from previous battle reports.

As usual - Pictures first, Commentary afterwards...

Spearhead Deployment, 5 objectives. I win the roll for first turn and deploy first.

Dave's Deployment.

My Deployment. The Dreadnought is still standing in for the 2nd Tyrannofex and the Swarmlord still has no arms (he does however have Tyrant Guard that look like Tyranids rather than the Chaos Spawn I had been using).

The objectives are in forests in the top right and bottom left. A 3rd is between the 2 middle forests with the 4th and 5th 12 and a bit inches away on either side.
Dave fails to seize the initiative for the first time in our last 3 games.

Dave's Valks and Vendettas had used their Scout moves to go far enough for cover saves.
The Tervigon sitting on my objective Spawned 14 Termagants to reinforce my home objective. Both Tervigons gave the advancing Termagants Feel no Pain though one of them rolled double 1 for her psychic test and gave herself a wound. Everything else advanced forward. My shooting kills a Vendetta and stuns a Hydra but fails dismally at everything else.

Daves return shooting has killed a few Termagants, A Hive Guard each from 2 of the units and wounds a few of the Monstrous Creatures.

I continue my steady advance forward after spawning another unit of Termagants to try and absorb some fire that's likely to finish off my 2, now 1 man Hive Guard units. My shooting stuns a Vendetta.

The Hellhound/Banewolf Squadron has moved forward to block my progress around the left flank. Long range Lasgun and Autocannon fire puts wounds on my big monsters and thins out the Termagants. My Swarmlord and Tyrant Guard make a stupid amount of cover saves meaning they should get stuck into assault in my turn. The Valkyrie unloads it's veteran cargo in order to finish off the Tyrannofex, however the combined fire of pretty much everything that's left on that side of the board can only reduce it to 1 wound.

Close up shot of the road block.

The Tyrannofex on his last wound...and some Pizza.

The one firey death machine dies, however the other is depressingly functional and I've charged into Flamer formation, lol.

The Hive Guard finally do something useful and kill the Valkyrie, The Tyrannofex thins out the Veterans with shooting and charges what's left. Meanwhile the Termagants move up to claim the objective after the Vets hopefully die (which they do).

The Swarmlord carves through the unit that it had assaulted. The Termagants however being out of range of their supporting Tervigon get slaughtered by the Guard Company Command Squad.

It then butchers another 2 units in it's next assault but is only on one wound. Having by now lost it's Tyrant Guard it has no way of getting a cover save so promptly dies in the next shooting phase.

This Vendetta manages to improbably survive another torrent of fire and readies itself to contest an objective.

The advancing Tervigon plonks itself on an objective.

At this point Dave throws the remaining surviving bits and pieces of units at my objectives in order to contest as many as possible. If the game ends on turn 5 it's a draw, if it goes another turn I should be able to easily clear 2 objectives for a hard fought victory.

We roll for the next turn and.....the game ends.....bollocks :-(

A pretty good game but I'm beginning to have doubts about the Swarmlord. He made a lot more cover saves than I could have reasonably hoped for and still only just managed to reach the enemy intact. In Dawn of War he'd have been lucky to get halfway across the board.

Editors Note : The Blood Angels game we played afterwards basically involved us running at one other, meeting in the middle and butchering one another. I won but nothing came up that was really informative enough to be worthy of a battle report.

I'll do a proper analysis tomorrow as I think I'm at the list tweaking stage now.

Comment are (as usual) welcome.


Friday, 23 July 2010

Tyranid Project - Interlude 4 - Charitable Contributions.

I happened to pop into my FLGS today and my friend and former staff member (he is now manager of a different GW shop) 'Tumnus' was sorting through various bits and pieces of his that were still knocking around the shop. We got chatting about current projects and I mentioned my Tyranids...

The phrase 'Would you like my old Battle for Macragge bitz as I'll never use them' entered the conversation. I gratefully excepted and was handed a GW bag of stuff. I promptly put it next to the bag of Tyranid spares that 'Hawkeye' had donated to me to sort out when I got home.

There was a lot more than I was expecting when I emptied it all onto my work tray...

Pile of awesome free stuff.

From 'Hawkeye'.

From 'Tumnus'.

After a bit of organisation...

53 Termagants,

14 Genestealers,

And more Spore Mines, Scything Talons and other stuff than I'm ever likely to use...

They say that 'Charity begins at home', in my case apparently 'Charity begins at your FLGS' ;-)

Thursday, 22 July 2010

Tyranid Project - Part 8 - 2000 points possibilities.

The boxes I need to finish off my 1750 Tyranid army arrived today.

I have a Carnifex to turn into a Tyrannofex,

3 Warriors which are becoming Tyrant Guard,
and some Termagants which are becoming...well...Termagants...
I would also at this point like to thank my friend and long time Tyranid player 'Hawkeye' for his generous donation of Tyranid spares that combined with the above boxes will enable me to finish building my units.

This means I should have a 1750 army that I can use without Proxying anything by the end of the weekend.

This means 2 important things,

1) I can start using my army for test games at my FLGS without feeling like a knob *
* I don't mind Proxying units at home or at a friends for the purposes of testing but don't like doing it for 'pick-up' games as I think it's a bit lame.
2) I can get ahead of myself and start thinking about what to do at 2000 points.

As long as I'm keeping the 1750 fairly close to it's current form (No unit has particularly let me down or shown itself as a weak link yet, I am only 2 games in though) those amongst you who are good at maths will have worked out that, that leaves me 250 points to spend.

So what viable options can I get for the points?

1) Tervigon + Termagants.
A Tervigon with the appropriate upgrades and a unit of 10 Termagants to make it 'legal' cost me 245 points or (and this is also a concern for me though it may or may not be for all of you) £42 of real money (Carnifex £27, Termagants £15).
This gives me another 2 scoring units, 1 of which is actually quite tough. It also allows me to have a Tervigon and Brood to hold my objective while leaving the other 2 to advance on other objectives and dish out 'Feel no Pain' and Synapse support to whatever needs it.

2) Hive Guard
Increasing the 3 units of Hive Guard to 3's significantly (well 2 extra shots at S8 is pretty significant in my book) increases my anti-vehicle firepower. That only costs me 150 points and £36 (1 box of warriors and the 2 extra weapon sprues I need to make their guns).
Being S8 ignores the Feel no Pain that every army I face seems to be full of at the moment, lol.
It also makes them more likely to be able to glance Land Raiders to Death (or immobilisation, which is the same thing as death for a transport ;-) )** should I face a Raider Spam army that my Tyrannofex's are unable to handle.
Though by no means their primary role, 6 S5 attacks at WS4 combined with their Toughness of 6 and 2 wounds each makes them an adequate combat/tarpit unit in a pinch.
That does however leave me with 100 points which is a slightly odd amount in a Tyranids list as all the good stuff is quite expensive or cheap and rubbish, though it would buy me a Tyranid Prime as a secondary close combat threat.

** I know the odds aren't good but I've immobilised and significantly disarmed Land Raiders with Krak Missiles enough to know it can happen even if it's not likely.

3) Tyrannofex
265 points (and £27 of real money) means I'd have to scrape another 15 points from somewhere but that's easily obtained by dropping the Stranglewebs from the Termagants .
Question is do I need a 3rd set of S10 guns?
Well obviously they're nice to have and combined with the free stuff they do make an impressive anti-infantry unit once they get close. That one will take a bit of thinking about.

4) Harpy
170 points with the Twin-Linked Venom Cannon and about £35 depending on what I used to make one.
If I want an extra gun platform I think I'd prefer another Tyrannofex. However, the Harpy is obviously a lot more mobile and is capable of considerable anti-infantry firepower.
Being one of the few Tyranid Monstrous Creatures that's only T5 combined with 4 Wounds and a 4+ save means a couple of 85 point Predators would shoot it out of the sky with little effort (as would any comparable 'Torrent of Fire' unit). Suddenly, I'd need 2 or even 3 of them and that changes the rest of the army considerably.
On the face of it I'm not impressed but I'm open to opposing viewpoints...

5) A big horde of something...
Something that would draw a lot of firepower that would otherwise be aimed at the rest of my army would be nice. I best split this section up, I suppose.

a) Ripper Swarms
I'm only joking...moving on...
b) Termagants.
Well I can make those for free with the Tervigons so if that's what I want I'd just go with option 1 and buy a Tervigon as well...
c) Hormagaunts.
Anything in the Tyranid book that's only S3 really needs Toxin Sacs. Furious Charge might be nice on these as they're fairly quick so might actually get to charge something. Unfortunately that makes them 10 points each and I'm not sure they're worth it. They'll also quickly out-range the Tervigon that may have been able to increase their survivability with 'Feel no Pain'.
d) Gargoyles
With the (imo) necessary Toxin Sacs and Adrenal Gland upgrades these weigh in at 8 points each so I could have 2 units of 15 for 240 of my 250 points. Given their 18" charge range these can be kept in Synapse Range at the beginning of the turn and then thrown into combat pretty much straight away in turn 2. I may have to do some Mathshammer on these as I'm not sure if they'll ever kill enough on the turn they charge to make them survive very long into the 2nd round of combat. As a distraction unit however they seem the best option out of the 4 'horde' units.

From a personal point of view I'm not sure that any of those 'horde' options compliment my army as well as another Monstrous Creature would.

The Others.
I'm sure there are perfectly good arguments for Genestealers, Trygons, Mawlocks and any number of other things but they're all units for other army builds as far as I'm concerned and I'm too skint at the moment to start looking at completely differently focused Tyranid armies, lol.

That turned into a bit of a longer wall of text than I originally intended...

The floor is now open for opposing viewpoints, but bear in mind we are talking about units that compliment this army rather than their value as individual units in other builds.

Thoughts?

Tuesday, 20 July 2010

Tyranid Project - Part 7 - Game 2 vs. Blood Angels


My 2nd Test game was also vs. Blood Angels but it was a very different army and therefore offered up some interesting new challenges.

This was Toms list,

1750 Pts - Tom's Blood Angels

HQ: Astorath the Grim (1#, 220 pts)
1 Astorath the Grim @ 220 pts (Fearless; Honour of the Chapter)

Elite: Chaplain (1#, 100 pts)
1 Chaplain @ 100 pts (...in Power Armour)
1 ...in Power Armour

Elite: Sanguinary Priest (1#, 50 pts)
1 Sanguinary Priest @ 50 pts (Sanguinary Priest in Power Armour)
1 Sanguinary Priest in Power Armour

Troops: Tactical Squad (11#, 250 pts)
9 Tactical Squad @ 250 pts (Flamer; Missile Launcher; Rhino)
1 Sergeant (Bolt Pistol; Power Weapon x1)
1 Rhino (Extra Armor)

Troops: Death Company (10#, 520 pts)
1 Death Company @ 520 pts (Equip with Jump Packs; Lemartes, Guardian of the Lost; Death Company; Death Company; Death Company; Death Company)
1 Lemartes, Guardian of the Lost
1 Death Company (Jump Pack; Power Weapon)
1 Death Company (Jump Pack; Infernus Pistol)
1 Death Company (Jump Pack; Power Fist)
6 Death Company (Jump Pack)

Troops: Death Company (10#, 300 pts)
1 Death Company @ 300 pts (Death Company; Death Company; Death Company; Death Company; Rhino)
1 Death Company (Infernus Pistol)
1 Death Company (Power Weapon)
6 Death Company
1 Death Company (Power Fist)
1 Rhino (Extra Armor)

Troops: Assault Squad (6#, 200 pts)
4 Assault Squad @ 200 pts (Remove Jump Packs; Infernus Pistol; Razorback)
1 Sergeant (Remove Jump Packs; Bolt Pistol; Power Weapon x1)
1 Razorback (Extra Armor; Lascannon and TL Plasmagun)

Troops: Death Company Dreadnought (1#, 125 pts)
1 Death Company Dreadnought @ 125 pts (Blood Talons)

Total Roster Cost: 1765

No matter how I add up his list in Army Builder it always ends up 35 points short so I've a sneaking suspicion that he forgot to deduct the 35 point price break on the Assault Squads Razorback for removing Jump Packs when he added it up.
Editors note : Found the problem but now it's 15 points over, lol.


I used this list.

I proxied a 'Rifleman' Dreadnought as my 2nd Tyrannofex, 2 Chaos Spawn as Lash Whip Tyrant Guard with my armless Trygon as my Swarmlord.
I also had a big pile of Guardsmen to proxy in the event that I spawned a lot of Termagants.

We rolled the 2 Objective mission with 'Spearhead' deployment. I won the roll off and went first. We both placed our objectives in the middle of the small forest in our deployment zones.

As usual I will be posting the picture first and the commentary afterwards.

I also forgot to take pictures of the first turn so I'll explain what happened first.

I deployed in a rough semi-circle at the front of my deployment zone, I sat a Tervigon just in front of my Objective. I put a Tyrannofex on each end of my lines and 2 units of Hive Guard behind a wall of Termagants to give them a cover save as they would have to deploy out of cover to be in range of Toms vehicles for my first turn of shooting. I kept the 3rd unit of Hive Guard in cover to give my Tervigon some fire support. The Swarmlord by necessity deployed right at the front of my lines as he's fairly fucking slow and needs as much of a head start as possible.

Tom failed to seize the initiative.

I didn't bother to Spawn any Termagants first turn as I didn't want to risk running out early on until I knew where and when they were going to be needed most. Everything except the objective defending units moved as far forward as possible.

I used Catalyst to give Feel no Pain to the Termagant units

My shooting destroyed the Dreadnought and de-meched the Rhino mounted Death Company. The Swarmlord was too far away from the Jump Pack Death Company to use Paroxysm on them so his unit ran forward instead, as did the Termagants who were out of shooting range anyway.

Toms Razorback moved forward 12" so it could still fire one weapon, the foot Death Company moved as far forward as there difficult terrain rolls would let them (it was enough to get them out of the terrain though). The Jump Pack Death Company headed straight for the Swarmlord and his bodyguard.
Toms Razorback Plasmagun took a couple of wounds off the Tyrannofex and his other shooting killed some Termagants.
The Jump Pack Death Company as expected multi-charged both the Swarmlord unit and the nearby Termagants (This unit also contained both Lemartes and Astorath). Tom focused enough of his attacks into the Termagants to kill them and the rest took out a Tyrant Guard. My attacks only killed 3 Death Company forcing me to take 7 Fearless saves, fortunately I only took a couple more wounds.

This game took place directly after the first game so I hadn't reread any of the rules which means I made this stupid mistake for the 2nd time without realising...

'I'm a fucking idiot' break No. 1 (or No. 3 if your counting the 2 from the first game)
If I'd have bothered to read the Bone Sabre entry I would have realised that they cause instant death. Which means rather than try and chip away at the unit I should have just split my attacks between the characters and got the biggest threats out of the way first and then butchered the squad.

Some reinforcements seemed like a good idea so I started spawning Termagants, I got a unit of 10 and another of 14 which cheered me up immensely, lol. I moved the 1 Tervigon forward so it would give them the benefit of It's Toxin Sacs and Adrenal Glands I also gave them both Feel no Pain.
I ran both of the new units forward in the shooting phase as I wanted them ready to assault in my next turn. I focused all my shooting on the walking Death Company, I knew they'd get armour saves from it all but at least the S8 and S10 shots would bypass their Feel no Pain.
Lemartes, Astorath and pals killed the last Tyrant Guard and wounded the Swarmlord, several Death Company got sliced and diced first though.

I forgot to take pictures for a turn or 2 so quite a lot happened between those 2 pictures. I'll try to fill in the gaps for you as best as I can...

Tom shot one of the original Termagant units to death so that the Death Company wouldn't get distracted by them later as they were the closest unit to them. The Razorback with the Assault Squad in it headed towards my objective and shot another wound off the Tyrannofex on it's way. Astorath and Lemartes wounded the Swarmlord again but lost the rest of their Death Company pals while doing it. Lemartes took a wound which actually made him harder (If I'd have known that the Bone Sabres caused instant death it would have got rid of him completely, but that was my mistake not Toms).
50 Attacks from Poisoned, Furious charging Termagants didn't do as well as I would have liked but still managed to finish off that annoying bastard Lemartes, leaving Astorath in a bit of trouble as the Tyrannofex had decided to help out as well.
Some shooting immobilised the Razorback.
The Tervigons meanwhile had produced another 25 Termagants between them.
Astorath steadfastly refused to die...

The Tervigon edged around the Astorath battle with his latest brood of Termagants and headed for Tom's objective. Termagants assaulted the Razorback both preventing the Assault Marines from getting out and knocking a weapon off (I took the Twin-linked Plasmagun, obviously). The Tyrannofex shot up the Death Company a bit and then charged the 5 that were left.

A shot of Astorath the Unhappy's heroic last stand.

The Tyrannofex's charge has nicely blocked off the small gap in my Termagants that the Assault Marines could have used to get out of the Razorback.
Hive Guard shooting takes out some of the Tactical squad.

Astorath kills the Swarmlord, everything else kills Astorath.
The objective holding Tervigon produces another 10 Termagants, the other Tervigon ran out last turn. The 2 units with the dice in the middle have been given Feel no Pain as the Death Company have killed the Tyrannofex and are still a bit upset for some reason.

Massed firepower kills the last few Death Company and puts a serious dent in the last Tactical squad. Termagants have been advancing towards Toms objective.

The Tactical Squad remnants head towards their own objective to try for a draw, their Rhino already redeployed to contest their own objective so they have to walk.

Rather than risk failing my charge and in case the game ends on turn 5 I run a unit of Termagants towards the enemy objective rather than attempting to assault.

The 2 remaining Marines charge me based on the fact that I'm going to charge them. The Assault Squad continues to kill a Termagant a turn with their Lascannon, a loss I can happily live with.

The remnants of Toms army.

Result 2 objectives to me and none to Tom.

This game went much better with me actually remembering to use most of my abilities. I could kick myself that I somehow missed the 'Instant Death' reference in the Bone Sabre description but I assure you I won't be making that fuck-up ever again.

I was quite lucky to get that many Termagants but to be honest they didn't make that much difference to the outcome (The last 2 units I spawned just stayed where I initially put them as there was nothing for them to do anyway).

Not as many pictures in this report but It had been quite a long day.

Thoughts, comments, analysis and bits of strategic brillance are as usual welcomed.
Related Posts with Thumbnails